
This post will show you how to configure a Jenkins pipeline that will automatically build your project when you push code to a GitLab repository. We will be using a Jenkinsfile to define our pipeline, which is best practice. Here’s the workflow: Push to GitLab → Jenkins pipeline triggered → Run build (Maven) → Run JUnit tests (Maven) → Email result from pipeline If you don’t already have GitLab and Jenkins installed, you can follow the instructions in this post and then come back here. This post also assumes you have Java, Git, and Maven installed, along with a simple Maven project with at least one JUnit test. Make sure you’re able to successfully run mvn clean install and mvn test on your project before following along.
# Step 1: Create a GitLab Repository
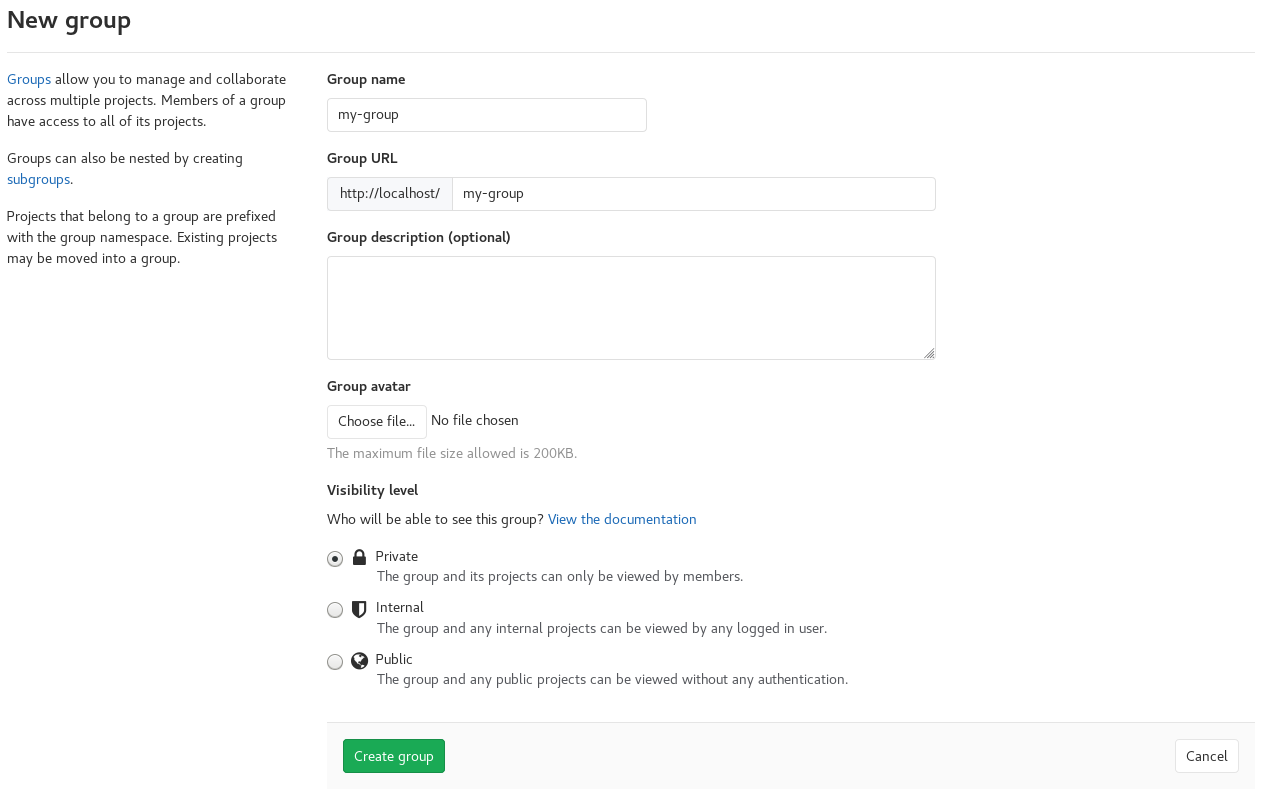
In GitLab, create a group by clicking on the Groups dropdown and then clicking the New group button. Give your group a name and then click Create group.
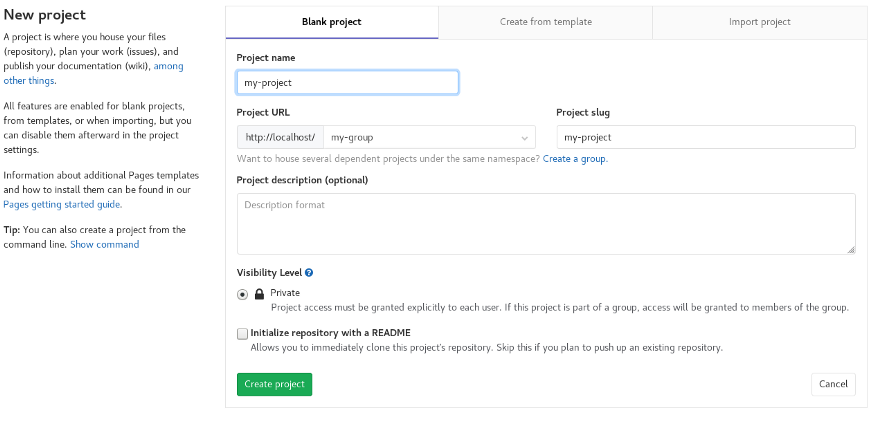
Create a new project by clicking New project. Give it a name and click Create project.
Initialize your local Maven project and push it to your new repository:
cd existing_folder
git init
git remote add origin http://localhost/my-group/my-project.git
git add .
git commit -m "Initial commit"
git push -u origin master
2
3
4
5
6
Refresh your project in GitLab and you should see your code. If you see a banner saying “The Auto DevOps pipeline has been enabled…” go into settings and disable it.
# Step 2: Create a Jenkins User in GitLab
We need to create a Jenkins user in GitLab so that Jenkins can communicate with GitLab’s API via the plugin we will install in Step 4. In GitLab, go to the Admin Area by clicking on the wrench icon in the top toolbar.
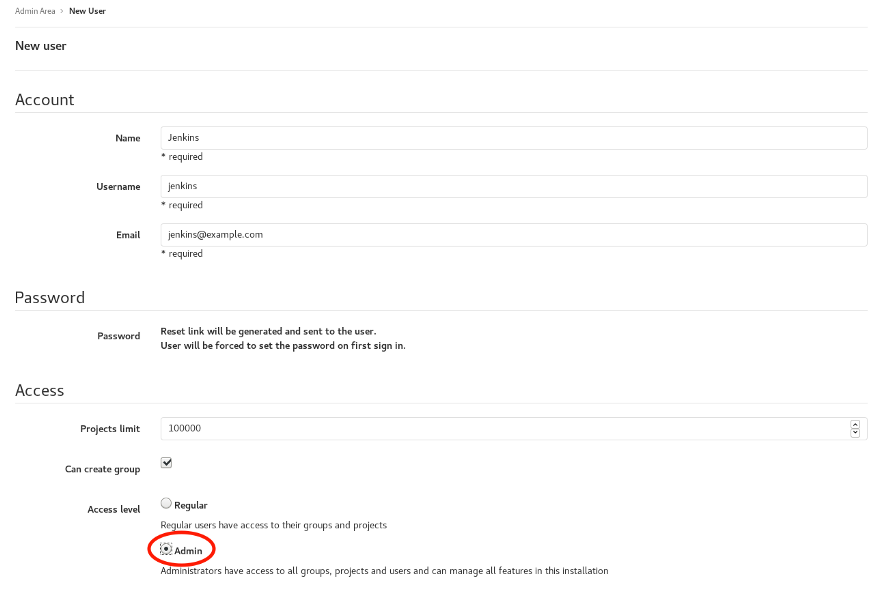
In the left menu, click on Users and then click New user at the top right hand corner. Fill out the required fields appropriately and make sure to select the Admin radio button under Access level:
Go back to the Users page and edit the Jenkins user you just created. Give the user a password so that you can log in as that user. Once you’ve done this, log out of your current session and log in as the Jenkins user. Once logged in as the Jenkins user, go to your settings and click Access Tokens in the left menu bar. Make sure to give your token a name and select api under Scopes.
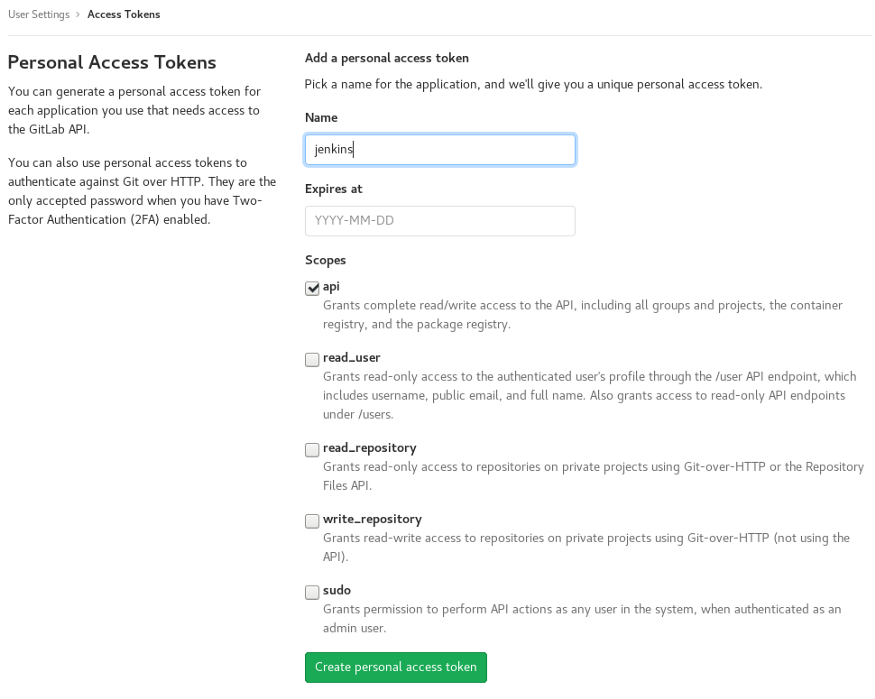
Once you have created the access token, copy and paste the token somewhere temporarily — you will not be able to access it from here again. We will use this token later. Log out and log back in as the root user.
# Step 3: Create a GitLab User in Jenkins
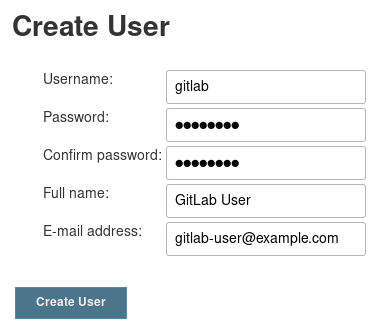
Now, we need to create a GitLab user in Jenkins so that GitLab can notify Jenkins of updates to the repository via webhooks. From the Jenkins homepage, go to Manage Jenkins → Manage Users → Create User and fill in the form.
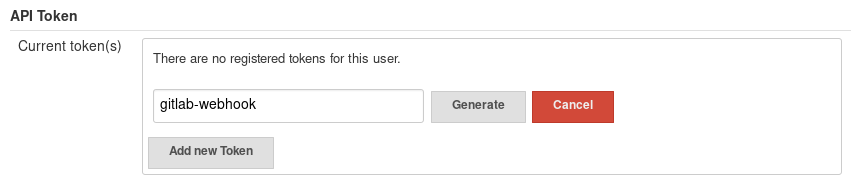
After creating the user, log out and log back in as the “gitlab” user. Go to Manage Jenkins → Manage Users and click on the gear icon next to the gitlab user to configure it. Under API Token, click Add new Token and give it a name, then click Generate.
Once you have generated the token, copy and paste the token somewhere temporarily — you will not be able to access it from here again. We will use this token later. Log out and log back in as the admin user.
# Step 4: Install and Configure GitLab Plugin for Jenkins
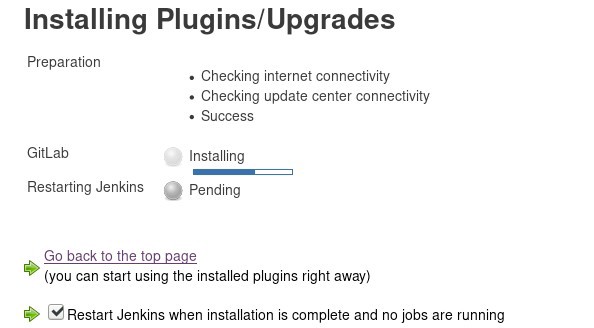
We need to install the GitLab plugin for Jenkins so that they can communicate with each other. On the Jenkins homepage, click on Manage Jenkins → Manage Plugins. Click on the Available tab and search for “gitlab” and install the GitLab plugin.
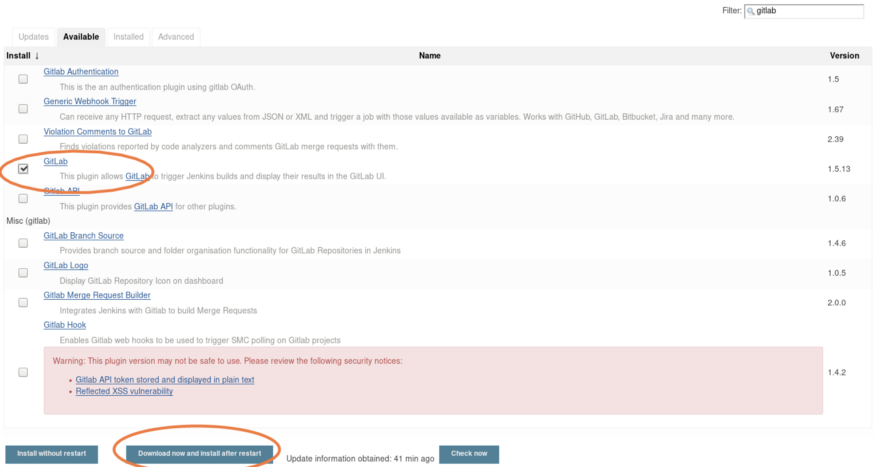
Check the box for “Restart Jenkins when installation is complete…” If you miss this, you can also restart Jenkins with sudo systemctl restart jenkins after the download has finished.
After about a minute, refresh the page and log back in as the admin user again. In Jenkins, go to Manage Jenkins → Configure System and scroll down to the Gitlab section. Enter in a name for the connection, the URL to your GitLab instance, and then next to Credentials, click Add → Jenkins. This is where you will add your GitLab token from Step 2.
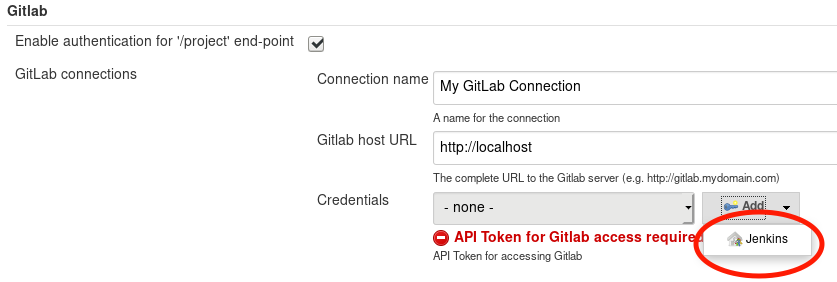
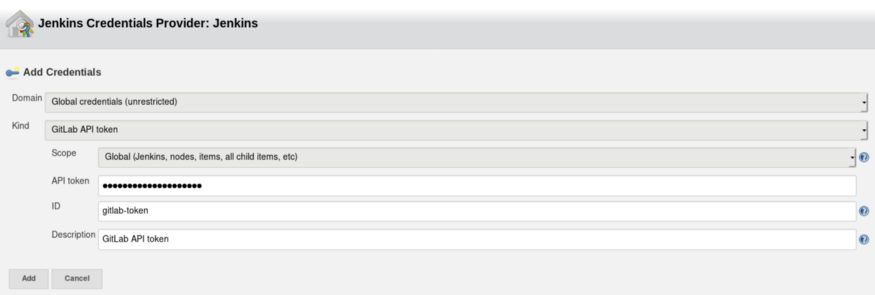
Next to Kind, select GitLab API Token. Paste your GitLab API token and give it an ID and a description, and click Add to add the token to Jenkins:
Click the dropdown next to Credentials and select the token. Then click Test Connection — you should see “Success” afterward:
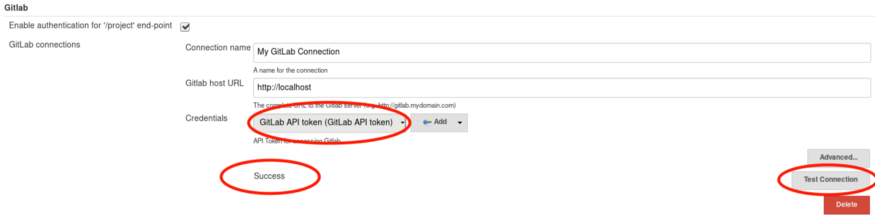
Click Save at the bottom of the screen to save your changes. You can view your newly created credential at Manage Jenkins → Credentials. Now Jenkins is ready to communicate with the GitLab API.
# Step 5: Create a Jenkins Pipeline
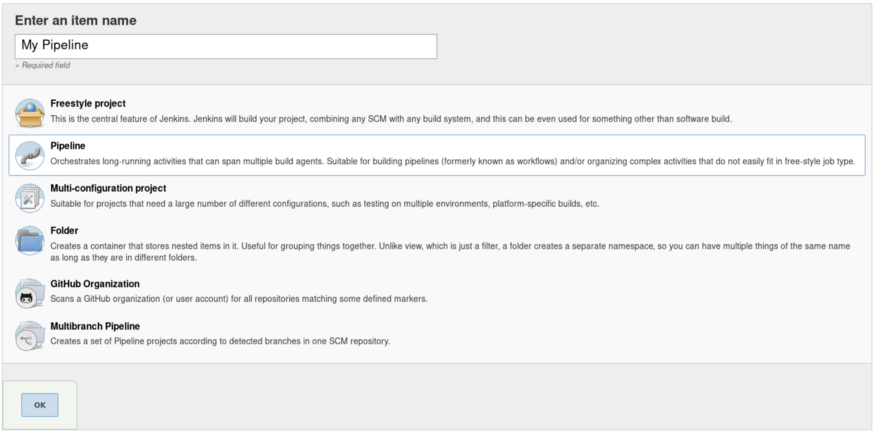
On the Jenkins homepage, click New Item in the left menu bar. Enter the name for the item and select Pipeline. Click OK to create it:
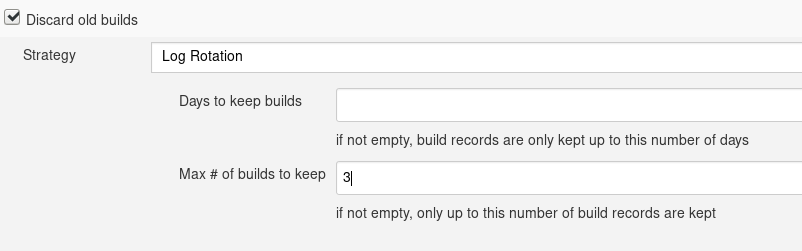
The next thing you will see is the pipeline configuration page. Check the box for Discard old builds and set Max # of builds to keep to a reasonable number (I chose 3 for this tutorial):
Ensure that the connection you created in Step 4 is selected next to GitLab Connection:

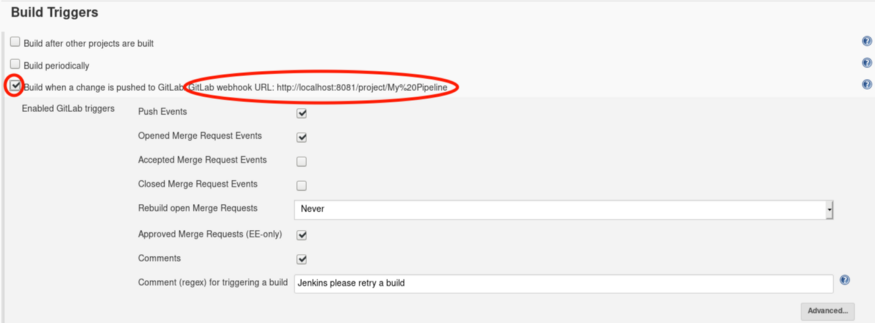
Under the Build Triggers section, check the box for Build when a change is pushed to GitLab and copy the GitLab webhook URL next to it for later. Leave the Enabled GitLab triggers section unchanged:
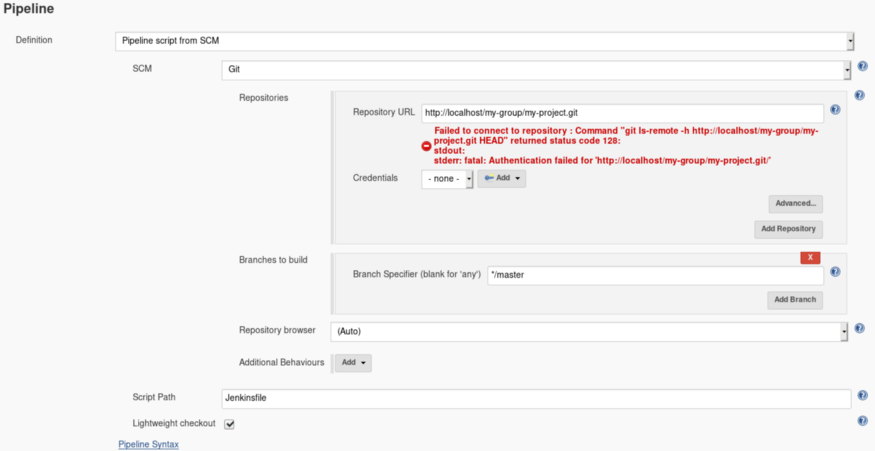
Under the Pipeline section, select Pipeline script from SCM from the Definition dropdown (this will be the Jenkinsfile described later) and select Git from the SCM dropdown. Enter the repository URL (same as what you use for git clone). You should see an authentication error because we haven’t provided a username/password that can access your GitLab repository yet:
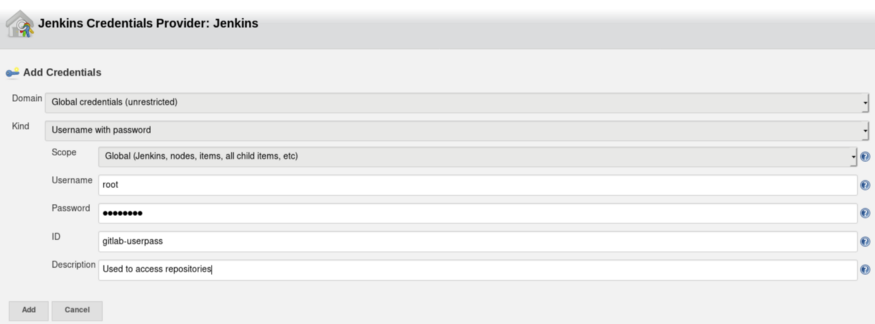
Next to Credentials, click Add → Jenkins and fill in your GitLab username/password and click Add:
Select your credential from the Credentials dropdown and the authentication error should go away. If it doesn’t, ensure you have the right username/password and that the user has access rights to the repository.
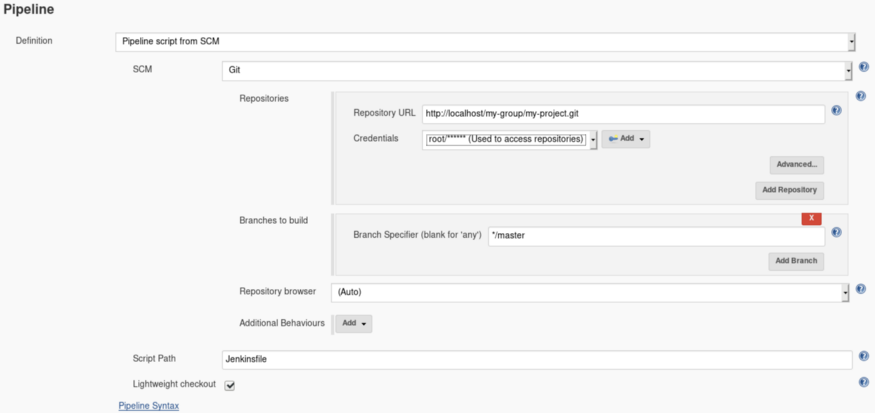
Click Save at the bottom of the screen.
# Step 6: Configure a Webhook in GitLab
We need a way for GitLab to tell Jenkins when code has been pushed to a repository — this is what webhooks are for. NOTE: If your Jenkins instance is running on localhost, follow these steps to allow GitLab to send requests locally: Go to the Admin Area Hover over Settings and click Network Expand Outbound requests Check the box for Allow requests to the local network from web hooks and services Click Save changes In GitLab, go to your project and then hover over Settings at the bottom of the left menu bar, then click on Webhooks. Enter in the URL to your Jenkins pipeline (the one you copied from the last step) and modify it so that it follows this scheme:
http://<gitlab-user-in-jenkins>:<token>@<host>/project/<project-name>
Leave the Secret Token field blank and ensure that Push events is checked.
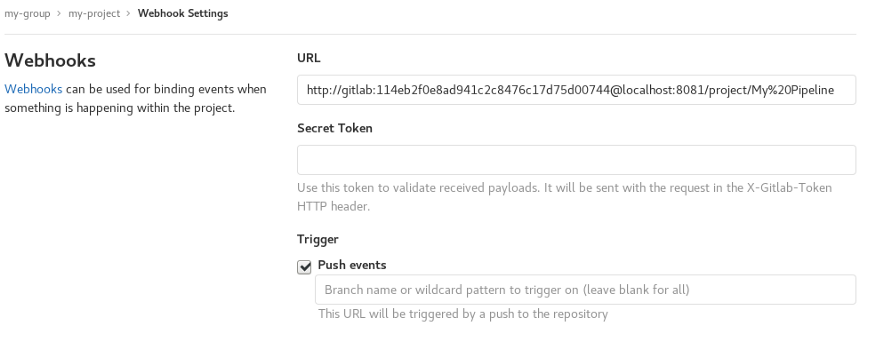
Click Add webhook and then scroll down to the bottom to see your webhook. Test it by clicking Test → Push events. You should see a 200 status code:
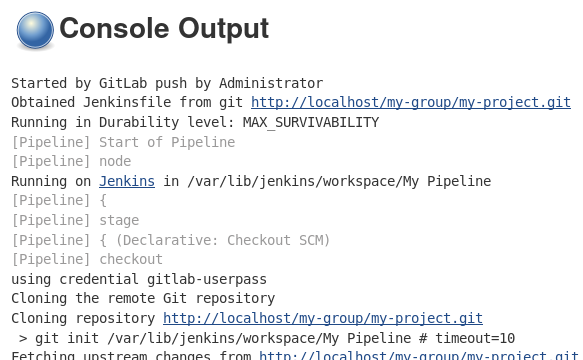
If you go back to Jenkins, you should see a failed build — this is good news because it means that the webhook worked, and that Jenkins is able to listen for pushes to your GitLab repository. If you inspect the Jenkins build console output, you will see something similar to this error:

# Step 7: Add a Jenkinsfile
Inside your git repository, create a file named “Jenkinsfile” at the root level. Paste the following into your Jenkinsfile and push it to your repository:
pipeline {
    agent any

    stages {
        stage('Build') {
            steps {
                sh 'mvn clean install -DskipTests'
            }
        }
        stage('Test') {
            steps {
                sh 'mvn test'
            }
        }
    }
}
2
3
4
5
6
7
8
9
10
11
12
13
14
15
16
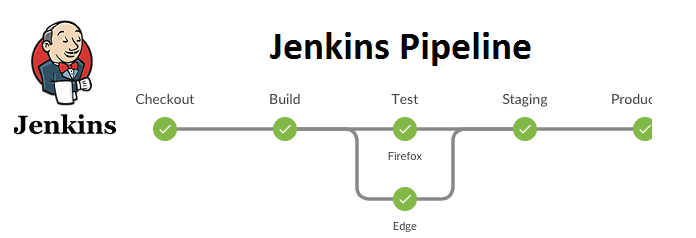
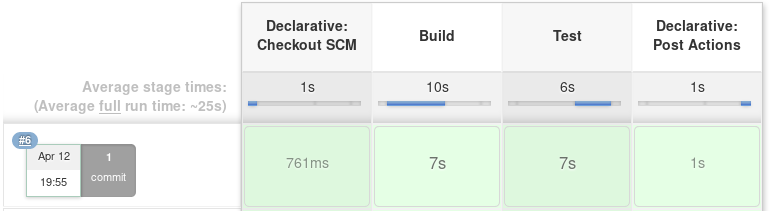
This Jenkinsfile is telling Jenkins to split the build up into stages — first a “Build” stage that builds our Maven project and then a “Test” stage that runs our JUnit tests through Maven. Assuming you have Maven installed and configured on the same machine that Jenkins is running on, you should see something like the following when you view your pipeline project in Jenkins:
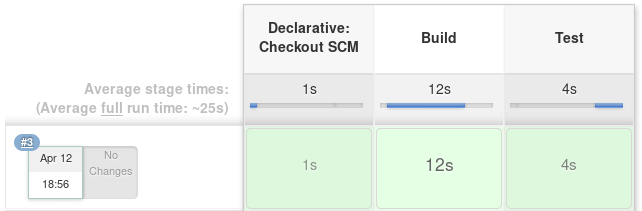
If you see a red rectangle instead of a green one in the Build or Test stages, it means that either your code failed to build or one of your unit tests failed. You can inspect the entire process by clicking on the build in the Build History section and then clicking on Console Output.
# Step 8: Email Notifications
It is common practice to have the pipeline send an email to the user who pushed their code to let them know whether their build passed or failed. If you don’t already have “Email Extension Plugin” installed, install that plugin before continuing. NOTE: Make sure the GitLab account you are pushing from has a valid email address — this is the address your pipeline will send an email to. Configure the plugin by going to Manage Jenkins → Configure System and scrolling down to Extended E-mail Notification. Fill in your SMTP server, click Advanced… and check the box for Use SMTP Authentication. Fill in your username (email address) and password, then check the box for Use SSL. Enter 465 for the SMTP port:
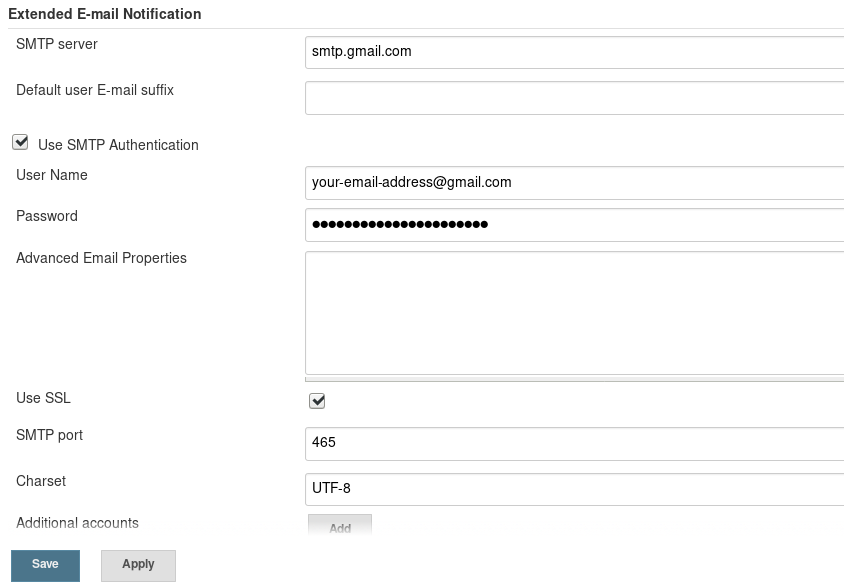
Scroll back up to the top, and under Jenkins Location, change the System Admin e-mail address to “Jenkins jenkins@jenkins” — this will appear as the sender name in the email you will receive.

Click Save at the bottom. In your Jenkinsfile, add the following “post” section after the “stages” section and push it to your repository.
pipeline {
    agent any

    stages {
        stage('Build') {
            steps {
                sh 'mvn clean install -DskipTests'
            }
        }
        stage('Test') {
            steps {
                sh 'mvn test'
            }
        }
    }

    post {
        always {
            emailext subject: "Jenkins Build ${currentBuild.currentResult}: Job \"${env.JOB_NAME}\"",
                body: "${currentBuild.currentResult}: Job \"${env.JOB_NAME}\" build ${env.BUILD_NUMBER}.\nMore info at: ${env.BUILD_URL}",
                recipientProviders: [[$class: 'DevelopersRecipientProvider'], [$class: 'RequesterRecipientProvider']]
        }
    }
}
2
3
4
5
6
7
8
9
10
11
12
13
14
15
16
17
18
19
20
21
22
23
24
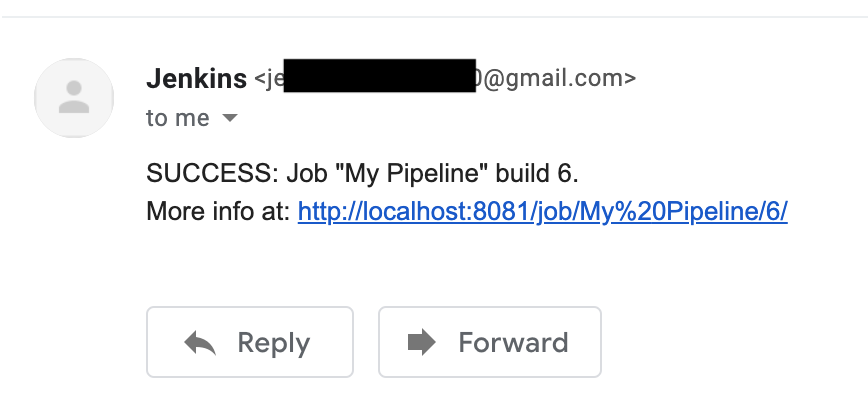
Here, we’re telling Jenkins to always send an email to the user after the build completes, and giving it a template for how to display the information. Go back to your Jenkins pipeline to see it running. If all went well, you should see something similar to the following and should have also received an email.
Congratulations! You have successfully set up a Jenkins pipeline to automatically build Java projects from GitLab.